 アップル信者<br>
5日目は、
Google AdMobの実装・手続き
について解説します。
アップル信者<br>App Storeに公開するとき、
並行して実施した
AdMob関連の手続きをまとめました。
前回、4日目に解説した、アップロード、リジェクト対応などの手続きは以下のページから確認ください。
次回、6日目に解説する、プライバシーポリシー、トラブル対応などの手続きは以下のページから確認ください。

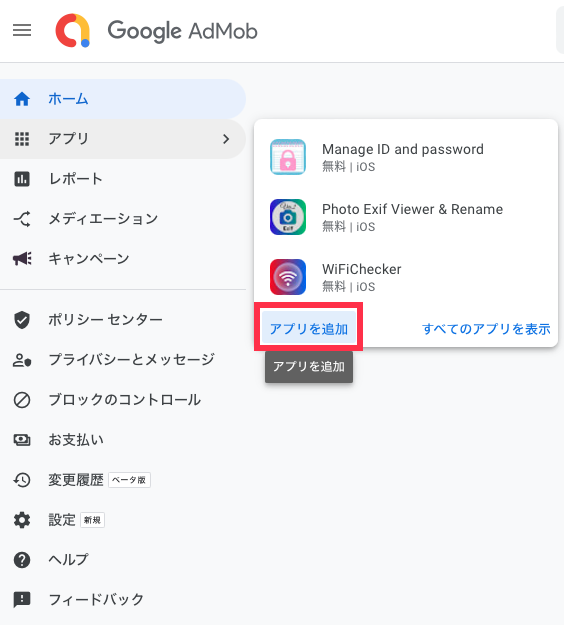
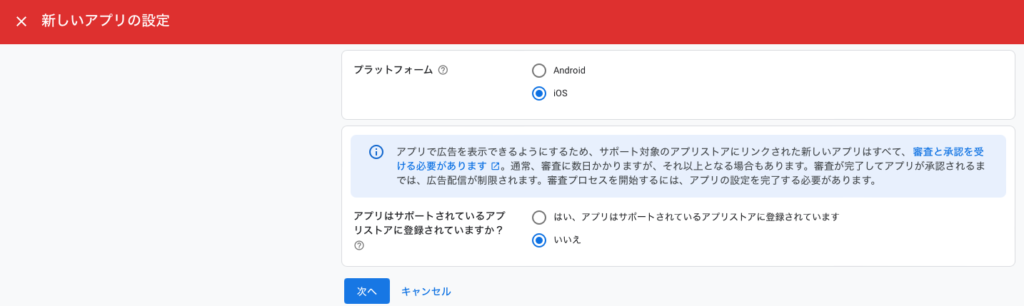
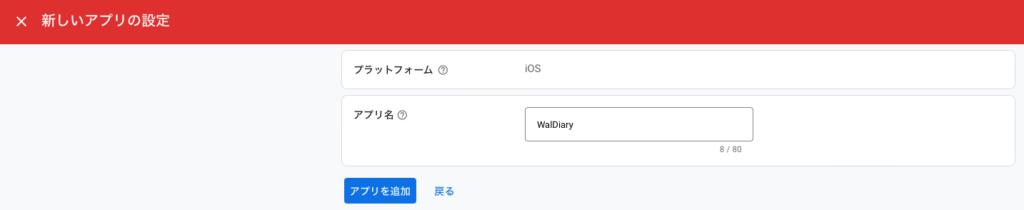
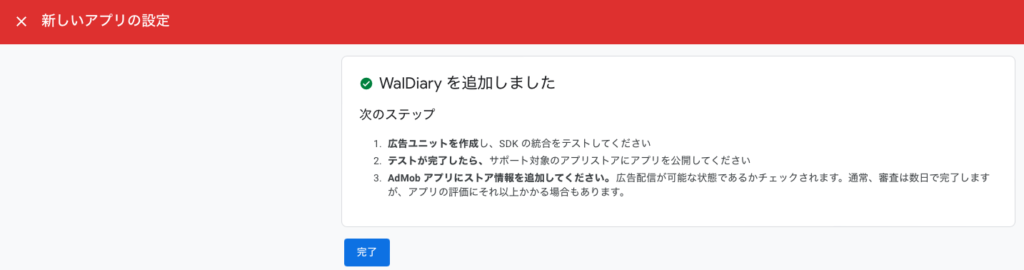
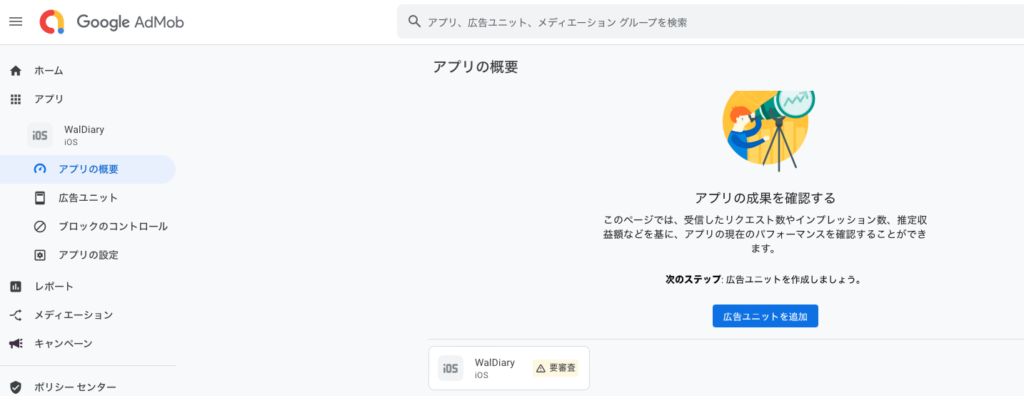
1. Google AdMobにアプリの登録
Google AdMobアカウントが作成済みとして解説します。

アプリで広告収入を得るためGoogle AdMobを登録します。
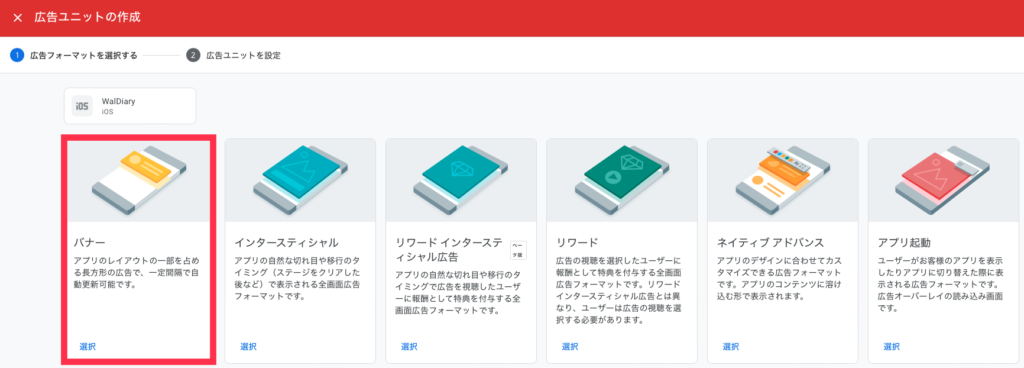
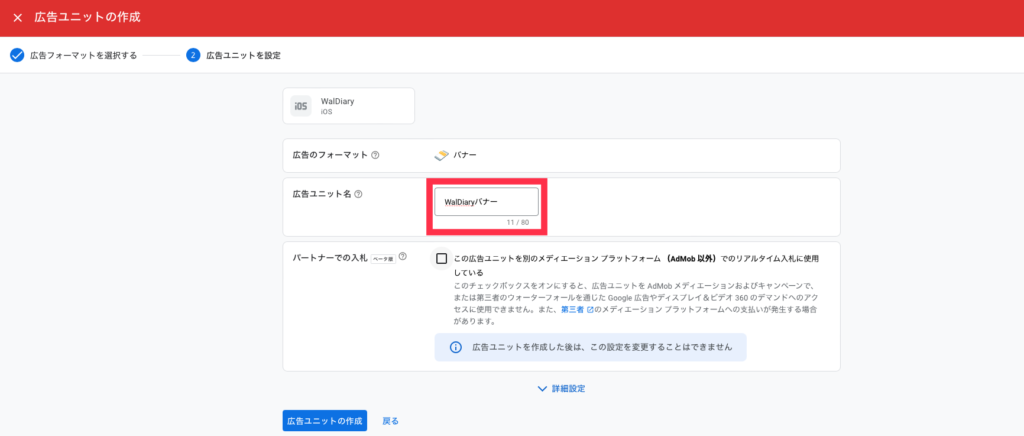

以下のように広告ユニットIDを登録して、テストIDと本番ID(上記ID)をすぐに切り替えられるようにしておく。

「Google Mobile Ads SDK ガイド」をクリック
2. Google Mobile Ads SDK のアプリへの統合
ここでは、AdMob で iOS アプリを収益化したいが Firebase を使用していない場合について解説します。

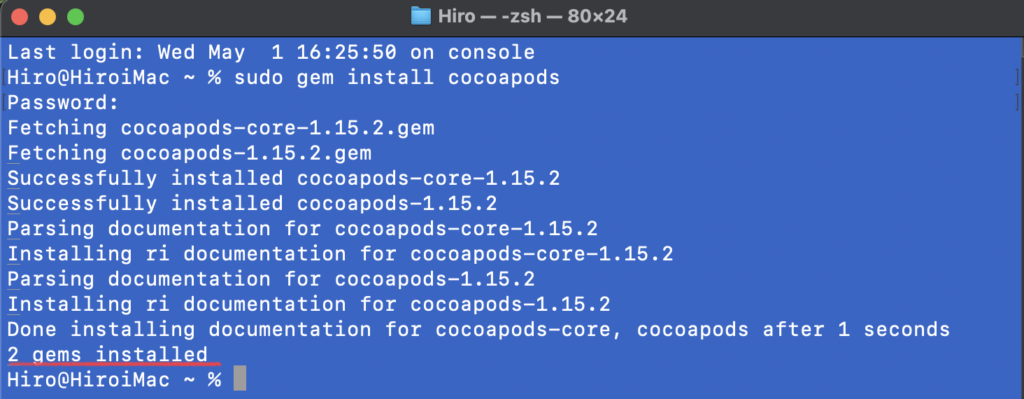
以下のコードを入力し、エンター。パスワードを聞かれるので入力。

以下のように、表示されれば、インストール終了。
以下のコードを入力し、Enterキー。

以下のようになれば、セットアップ完了。

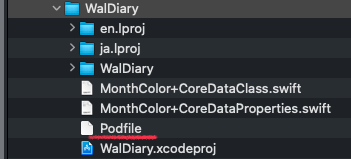
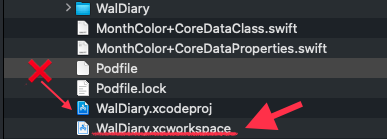
同じ名前が2つありますが、外側の階層を選択。

以下のコードを入力し、Enterキー。

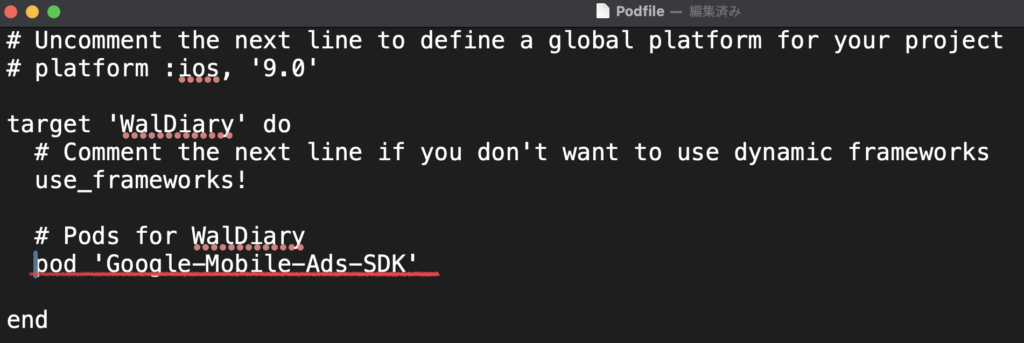
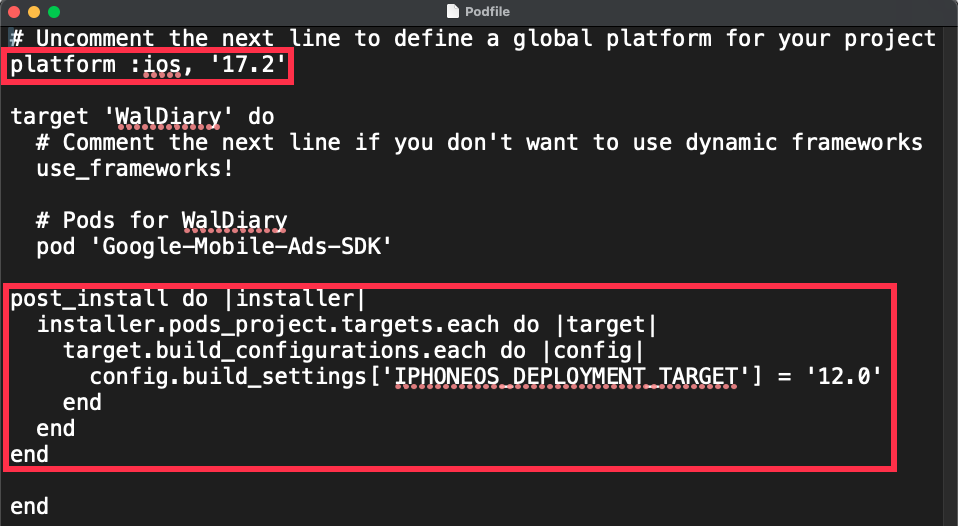
次の行を追記し、保存(コマンド+S)。
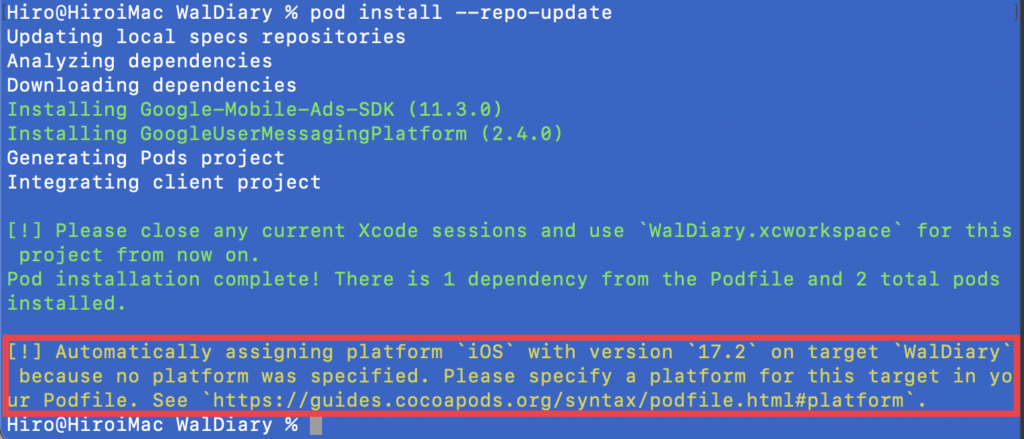
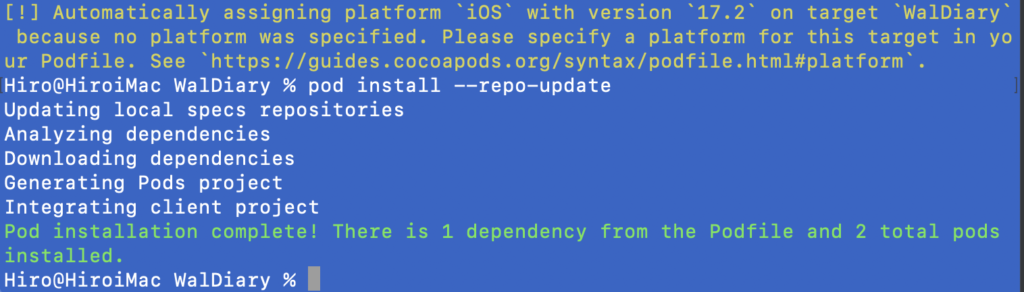
以下のコードを入力し、エンター。

以下の黄色のエラーが出る。
以下のように、Podfileを修正し、再度「pod install」すると、今度はエラーが出ませんでした。
3. Info.plist を更新する
一旦、Xcodeを終了し、以下の白いプロジェクトを開く。(開くまでに少し時間かかる)
「TARGETS」の「Info」タブを選択し、プラスボタンを押す。
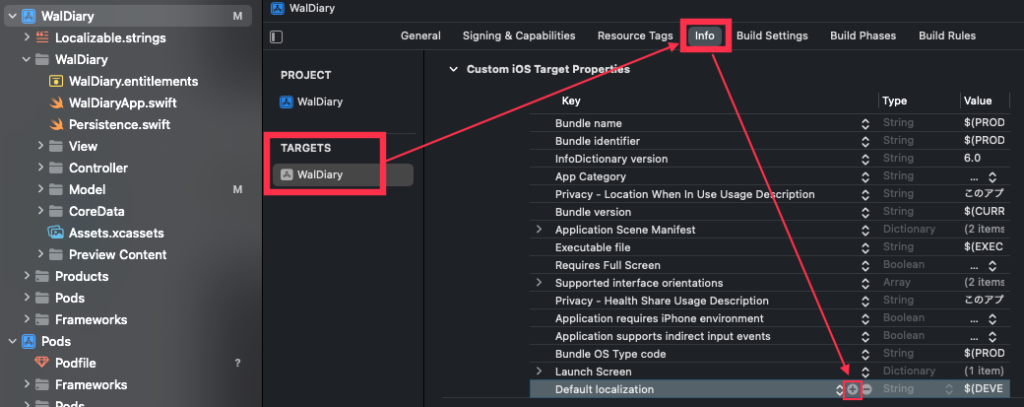
KEY、Value(広告アプリID)を登録
- Key:GADApplicationIdentifier
- Value:広告アプリID(STEP8の上のID)
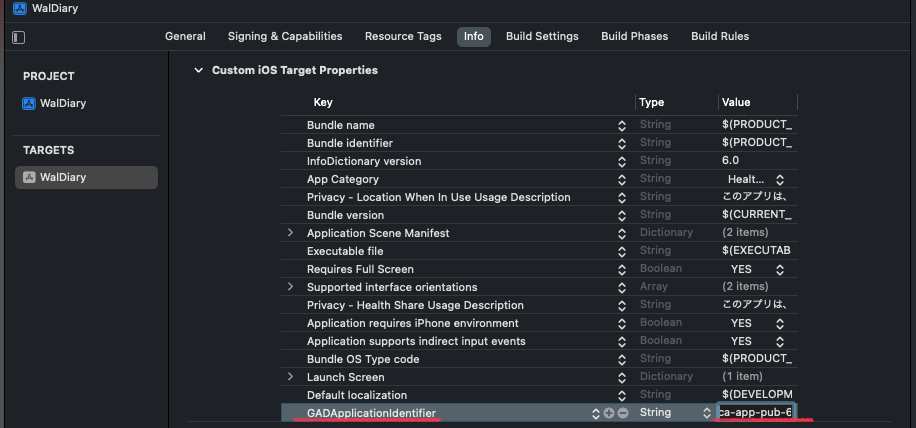
さらにプラスボタンを押し、KEY、Valueを登録
- Key:GADIsAdManagerApp
- Value:true
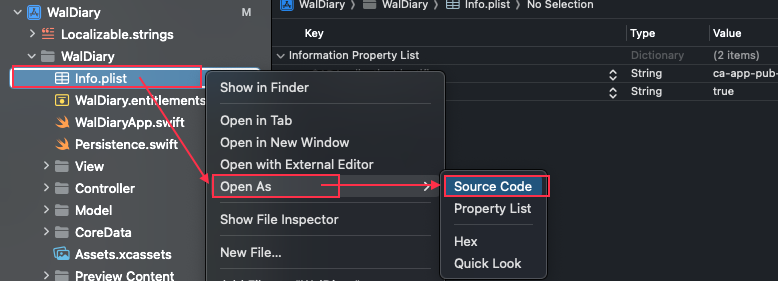
続いて、「Info.plist」右クリック、「Open As」、「Source Code」をクリック
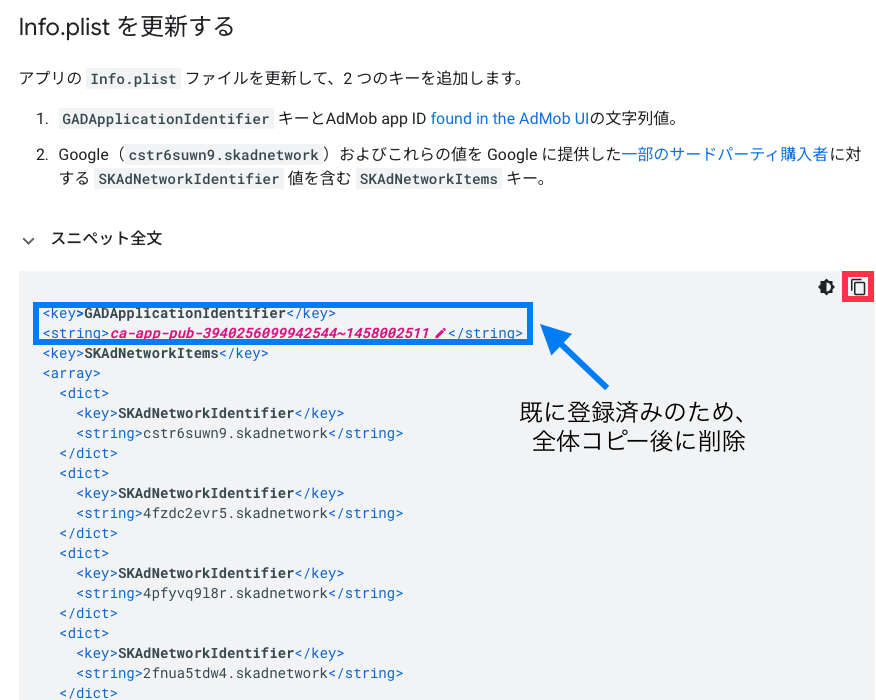
「Google Mobile Ads SDK ガイド」の以下の内容をコピー。
コピーボタン「赤枠」ですべてコピー後、登録済み「青枠」を削除する。
コマンド+Bを実行すると、以下のエラー。
Sandbox: bash(10648) deny(1) file-write-create /Users/Hiro/iOS-Pro/App/WalDiary/Pods/resources-to-copy-WalDiary.txt
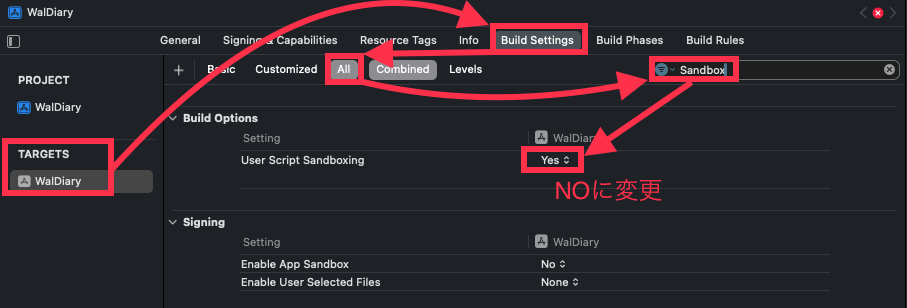
「TARGETS」、「Build Settings」、「All」を選択後、検索窓で「Sandbox」を検索
「User Script Sandboxing」を「Yes」から「No」に変更
再度、コマンド+Bを実行すると、エラーはなくなりました。
4. 広告表示のテスト
下記のバナー用のコードを作成し、ContentViewで呼び出すようにした。
import Foundation

import SwiftUI
import GoogleMobileAds

struct AdBanner: UIViewControllerRepresentable {
    func makeUIViewController(context: Context) -> UIViewController {
        let bannerView = GADBannerView(adSize: GADAdSizeBanner)
        let viewController = UIViewController()
        bannerView.adUnitID = K.adUnitID //バナー広告
        bannerView.rootViewController = viewController
        bannerView.load(GADRequest())
        viewController.view.addSubview(bannerView)
        bannerView.translatesAutoresizingMaskIntoConstraints = false
        NSLayoutConstraint.activate([
            bannerView.centerXAnchor.constraint(equalTo: viewController.view.safeAreaLayoutGuide.centerXAnchor),
            bannerView.bottomAnchor.constraint(equalTo: viewController.view.safeAreaLayoutGuide.bottomAnchor)
        ])
        return viewController
    }

    func updateUIViewController(_ uiViewController: UIViewController, context: Context) {}
}
import GoogleMobileAds
struct ContentView: View {
var body: some View {
ZStack {
}
AdBanner().frame(height: 50)
}
}画面下部に、バーナー広告の表示を確認。

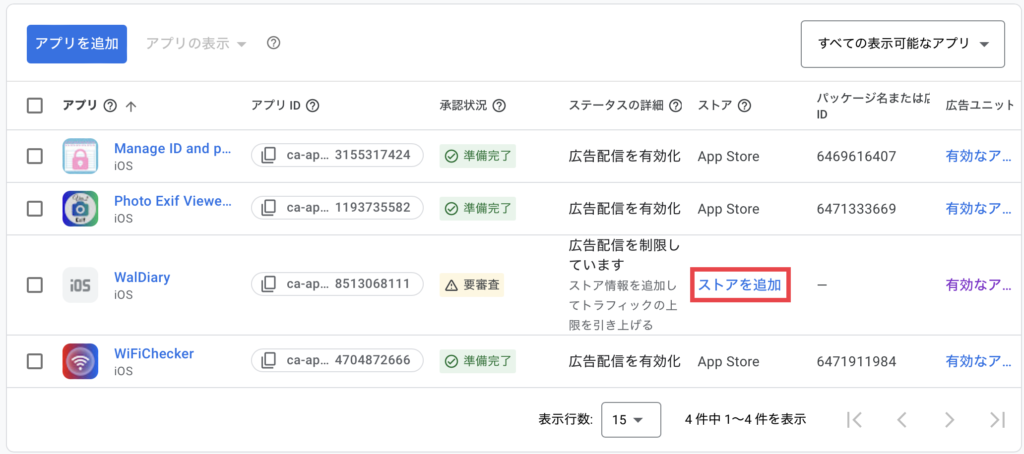
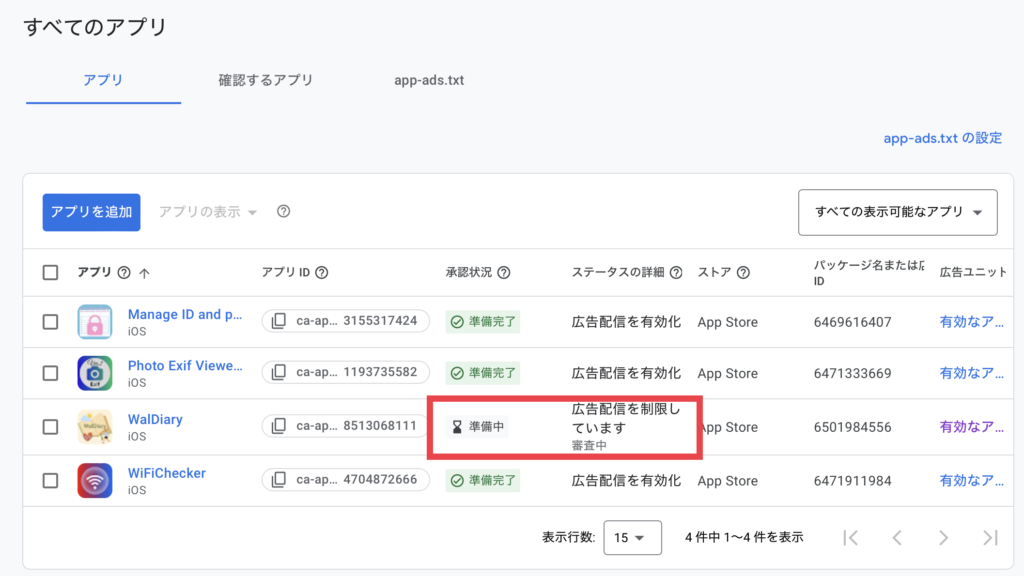
5. (アプリ公開後)AppStoreの追加
アプリ公開後、広告とアプリの結びつけが必要です。これをしないと広告収入が発生しません。
ストアを追加をクリック
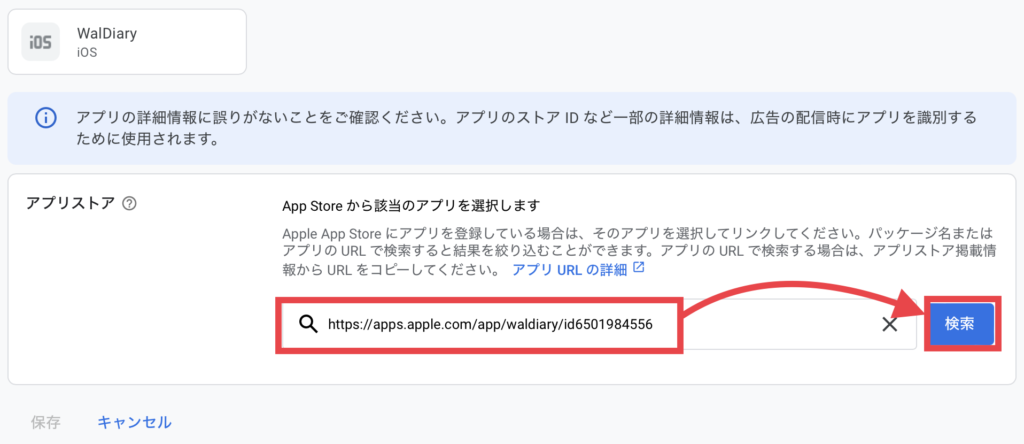
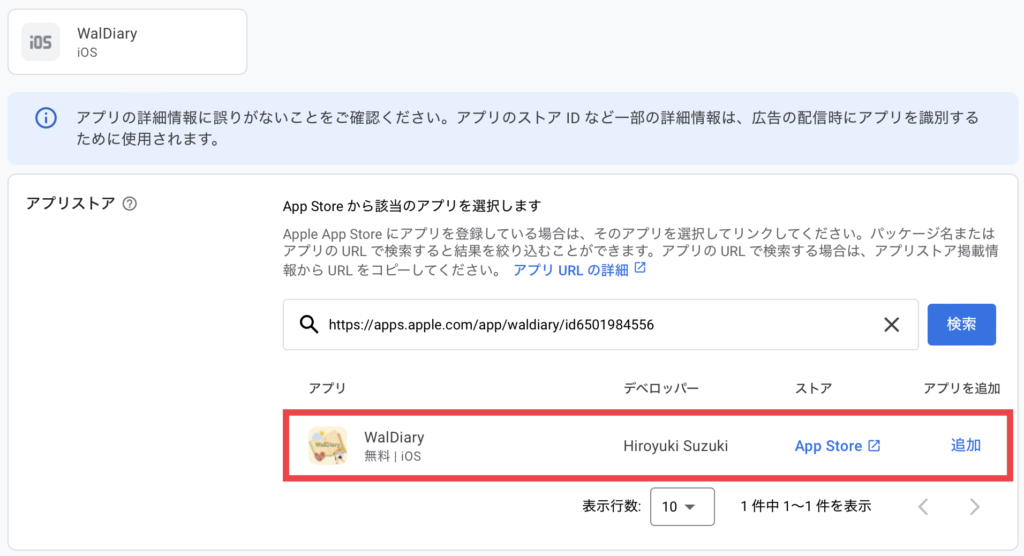
リリースしたアプリが表示されたら、「追加」をクリック
保存ボタンをクリック
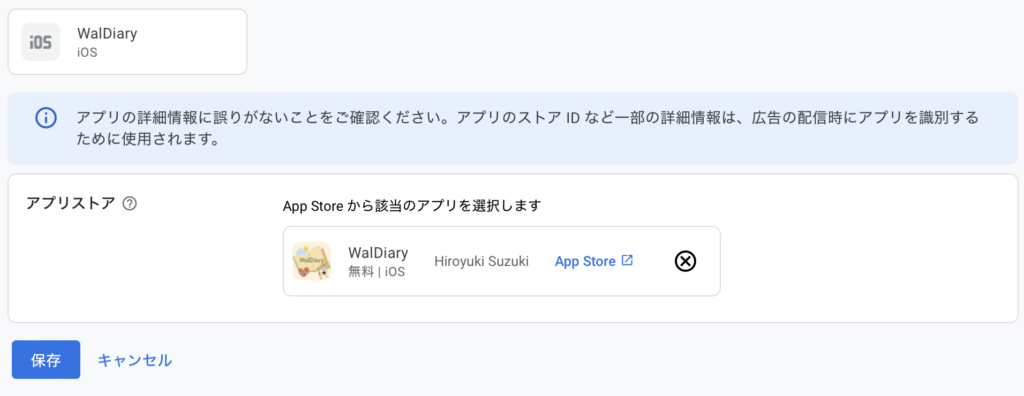
完了をクリック
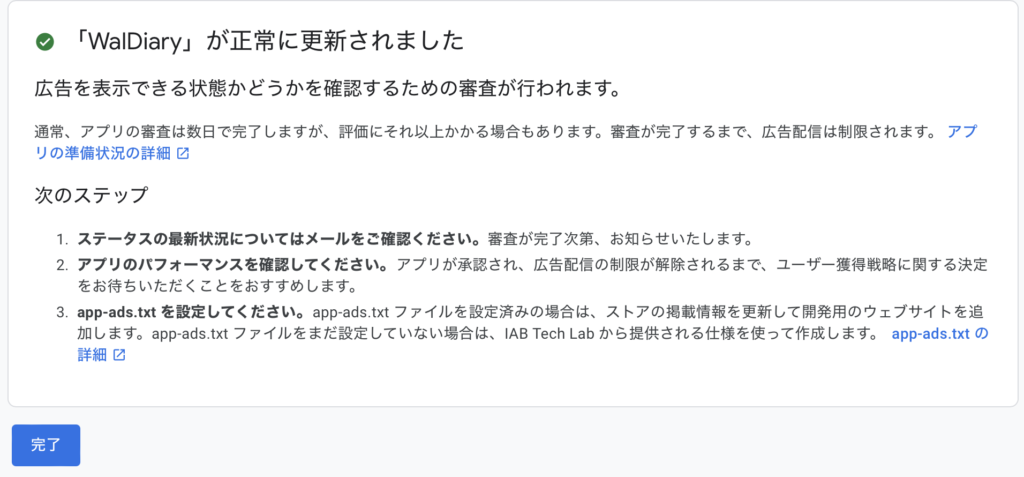
ステータスが「審査中」

コメント